I’m excited to be back with another installment in our Beautify your Blog, DIY Series! I hope we have been learning lots…
Check out what we’ve learned so far…
- Part 1… Fabulous Fonts
- Part 2… Dreamy Header
- Part 3… Sensational Signature w/Graphics
- Part 4… Customized Sidebar Titles
- Part 5… Easy Watermark Image {need picnik premium}
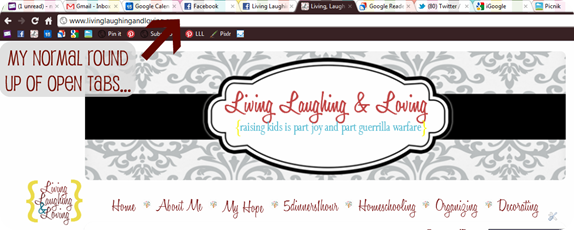
I’m an admitted internet addict. And with that addiction comes the compulsion to have one hundred eleven of my most favorite tabs open… at all times. :)
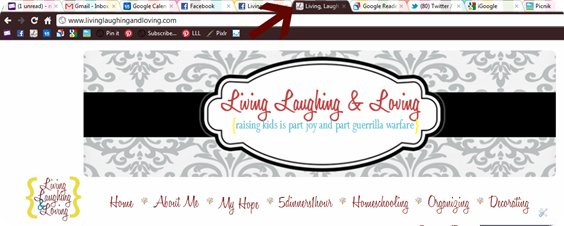
What makes me even happier in all my forty eleven tab bliss is when all my tabs have a custom favicon.
You know a favicon. That teeniest of teeny little squares with the brand’s logo… mini-sized right next to their name on the tab?
This used to be a sort of complicated process but blogger has recently made this SOOOO incredibly easy! Anyone can do this. If you can crop and upload a pic, then you can do it. :)
Step 1) Decide what you want your Favicon to be. This is a SMALL, SMALL pic we’re talking about here, so it needs to be something fairly cropped and zoomed. Otherwise, no one will even be able to tell what it is. One idea is to take the initials of your blog name, or even the first letter. I chose to use the letter “L” since it’s the first letter of all three words in my title…”Living, Laughing, & Loving.”
If you have a graphic in your header or blog button, that might be a good choice for your favicon.
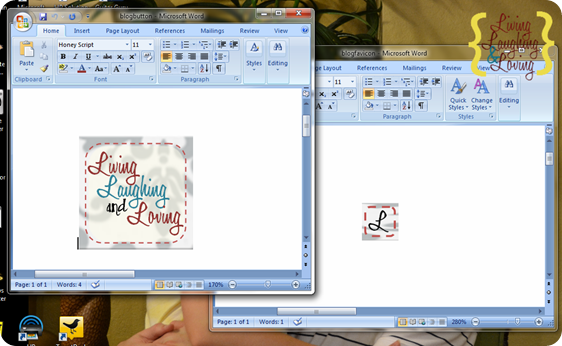
Step 2) Crop out your favicon image. Here’s a little secret… I created my blog button in Word. Yes, that’s right. Microsoft Word. The picture effects and borders and text boxes are just too easy for this photo editing novice to pass up. When I’m done, I take a cropped screen shot of the part I need and save it as an image.
I recently read somewhere of a blogger who made her header in Powerpoint which lets you easily save as an image, so that will save you a step or two right there.
Since my blog button was in Word, I opened that file up and cropped and resized borders etc to create my own custom favicon.
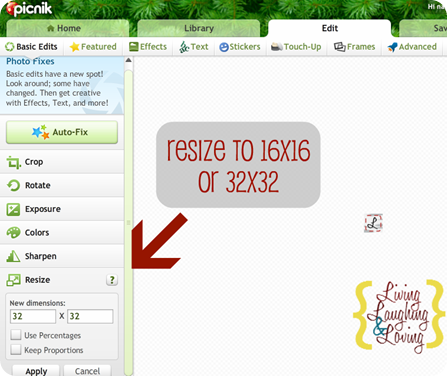
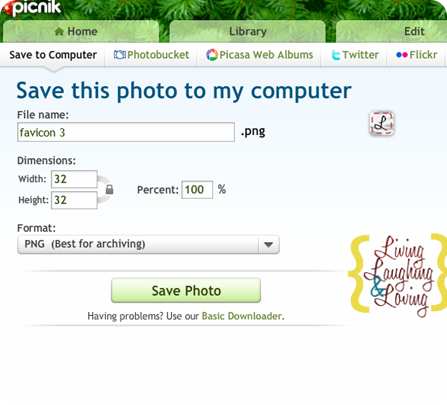
Step 3) Resize to a micro mini square. It’s got to be perfectly square and it can’t be bigger than 100 KB. Upload your favicon in Pixlr or Picnik to resize appropriately. I read an article, er, I guess, I skimmed part of an article, that said you want your favicon to be 32×32 pixels instead of the previously accepted 16×16 pixels since computer screens are getting bigger and bigger.
They said most browser can shrink a bigger one down, but making a smaller one bigger doesn’t produce the best results. So who knows. You decide.
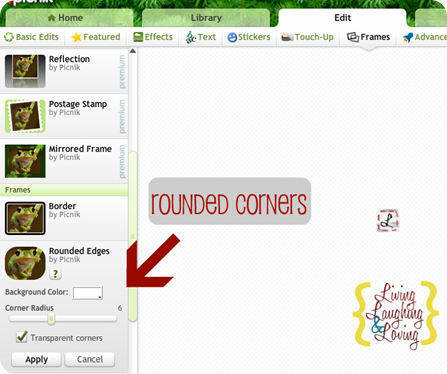
Once you’ve resized, you can even add rounded corners in picnik if you so desire. :)
Save as a png file.
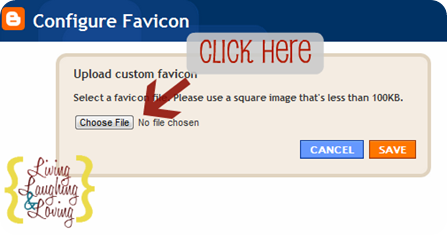
Step 4) Upload to blogger. Go to design, then on the left you’ll see the favicon editing area.
Click choose file and find where you saved your resized version.
Save and you’re done!
Now, when I first did this, the favicon wouldn’t show up for me for some reason. I tried to google why and found others with the same complicated issues, but eventually it worked. If yours isn’t showing, try restarting your browser and/or your computer and see if that gives it the magic touch. :) You can also do something called emptying your cache and clearing your cookies too, and you probably can google to figure that out too. :)
Another note, if you have gone to the darkside, uh, I mean, WordPress, here’s some favicon help for you.
Just cuz I love you. :)
Even more Bloggy Beautifying coming to you soon. Stay tuned!
Sometimes I Link to these great parties…Weekend Bloggy Link up, Tatertots & Jello, House of Hepworths, Delightful Order,Bowl Full of Lemons,Organize & Decorate Everything, Reasons to Skip the Housework, This Chick Cooks, Funky Junk Interiors, Somewhat Simple, Shabby Creek Cottage, No Minimalist Here, Skip to my Lou,Fingerprints on the Fridge,CRAFT,Today’s Creative Blog, the 36th Avenue, Thrifty Décor Chick, Home Stories A-Z, Honey we’re Home, and Someday Crafts. You should check ‘em out!!:










Oh my!! This is something that I have been wanting to do SOOOOO badly! Unfortunately the last time I spent an hour and a half trying to figure out how to do it with WordPress, I wanted to chuck my computer through the nearest window! :) haha! It DEFINITELY did not make me feel spiritual! :) Anyway – I'll check out your wordpress link – I hope I can figure it out! Thanks for the help – I like this series!
This is great! I've been wanting to do this for awhile, but had no idea how. Thanks SO MUCH!
Good morning! This is great! There is so much I still need to learn-so this is very helpful. I would love for you to link this up to My Favorite Things Friday Party that just started for the week. I'm stopping by from the Serenity Now Party.
XoXo
~Iffy~
StayAtHomeNation.blogspot.com
thanks for linking to a "darkside" article for my wordpress self – well 1/2 wordpress self :)
I had tried to do one before – but it was sort of lame and now it isn't working – so need to work on it again. :)
I adore your how-to series about blogging. It's been so helpful. Thanks so much for sharing!
thanks for the help and link for wordpress. Little Bit DecorateWithaLittleBit.com
I keep referring back to "Beautify Your Blog" whenever I want to do something new to my blog! Now I've added my very first button (SO exciting!) and this series gave me the inspiration to make it! Thanks again! xoxo
[…] Part 6… Customized Favicon […]
[…] Customized Favicon […]
Love it! Got mine done in no time! Stop by and check it out!
becomingblameless.blogspot.com